|
Stretches and Functional Movements descriptions: Passive Stretch: a passive position you hold for a long period of time (typically 2-5 minutes or more) to allow muscle tissue to lengthen beyond its functional capacity so as to encourage the growth of additional sarcomeres within each muscle involved to allow greater ROM and ease of movement. Active Stretch: an active position you hold for a short period of time (typically 1-10 seconds) to lengthen and retrain muscles to more effectively coordinate across a joint and allow for improved movement patterns, especially when each muscle is at its full-range functional length. Functional Movement: a constant motion movement you slowly practice to train muscles to more effectively coordinate across a joint and allow for improved movement patterns, especially when each muscle is at its full-range functional length. |
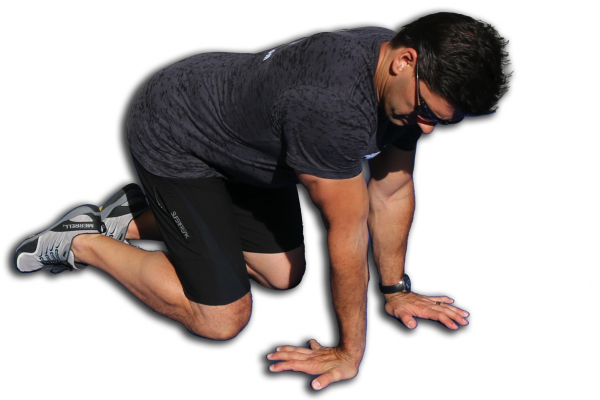
Active StretchesBelow are links to printable instructions and video downloads of active stretches we recommend to get the most out of your SMR efforts. Some of them can be exercised as a functional movement as well as a stretch. We recommend you try each movement and hold it for a short period of time to train your muscles to activate at full length prior to attempting faster repetitions. Moving quickly tends to utilize the nerve pathways you are already familiar with, which is why when you are learning new coordination you should move through the movements slowly to allow your nervous system to "learn" the new combination of activation for your muscles. As you repeat any movement many times over, it becomes easier for your brain to send signals along the nerve pathways to the muscles needed for that movement. You can then begin to practice the movements faster without sacrificing proper alignment (which should translate into fewer injuries and faster recovery times).
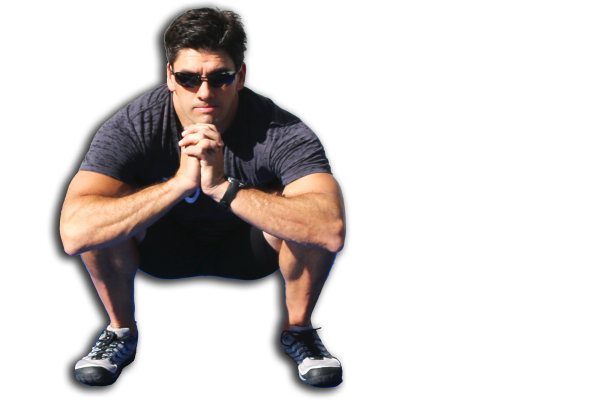
Many people are under the mistaken belief that squatting is somehow injurious to the knees. This is simply not true. However, squatting deeper than your flexibility allows, or with more weight than your strength allows, or for more repetitions than your endurance allows, or any combination of these excesses is in fact dangerous. Start squatting to a depth that you can comfortably relax into and gradually try to squat a little deeper each week. It is likely you can increase your squat ROM by 2-3 centimeters each week (maybe even more). Track your progress and before long you should notice your squats are full range (your hips are getting closer to your ankles) and your knees feel better as your ROM increases. Video coming soon.
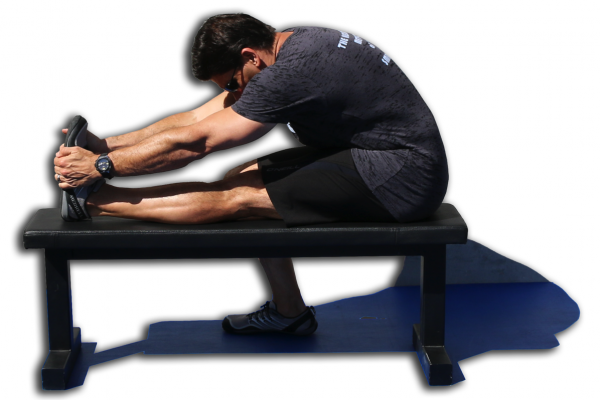
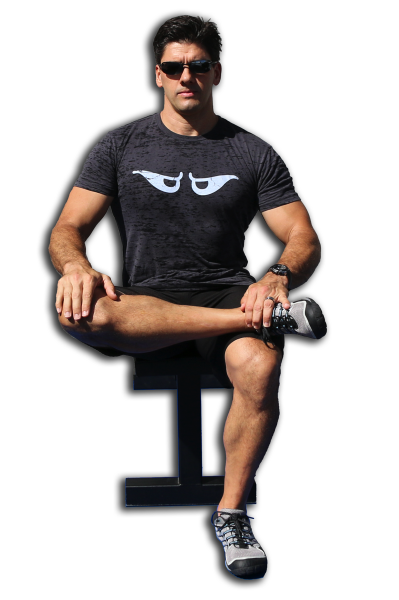
This is one way to scale the Nose 2 Knees stretches. By sitting on a bench you can focus more on relaxing your straight leg while you support yourself with your other leg. You can use a towel or strap to gently pull on your foot if you cannot reach it with your hands.
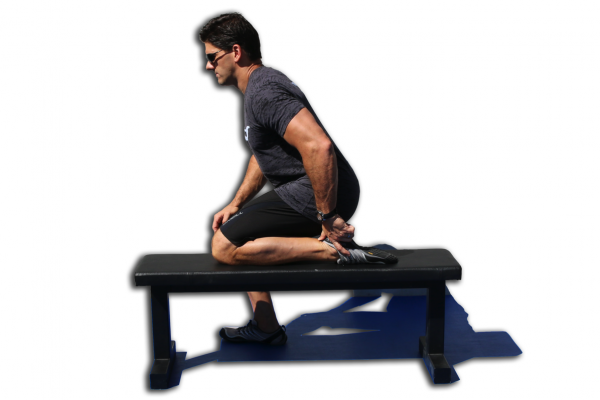
This is one stretch that is likely to involve "over-stretching." Over-stretching is the process of attempting to use force to lengthen a muscle or muscles, which actually does not lengthen the muscles due to the Stretch Reflex, but instead stretches the tendons attached to the muscles. This can irritate the tendons and lead to tendonitis or other inflammation of the joint tissues. Learn to relax more and feel your muscles "slide" open rather than trying to use more force and your flexibility efforts will work faster. Video coming soon.
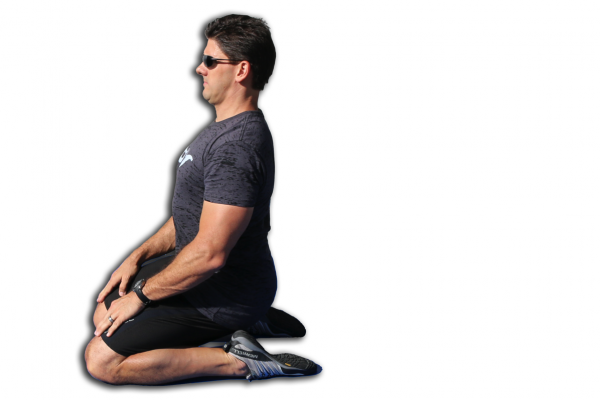
If you struggle with kneeling with your toes tucked under you because your quads or shins are so tight then this stretch is one way to open them up. Much like the Bench Foot Grab, this stretch allows you to lighten the load applied to the muscles you are attempting to stretch by using your other leg for support. If you load your muscles too much as you attempt to stretch them they will never release. Scale your movements when necessary to achieve quicker relief. As this stretch gets easier you should be able to practice the Hurdle stretches and Hero Pose more comfortably. If Hero Pose is already easy for you then this stretch will be too easy, as it is a regression of Hero Pose.
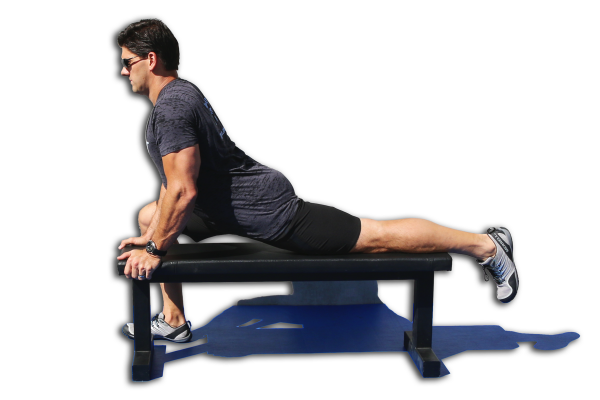
4) Bench Lunge, click here. This is one of many stretches we have for lengthening the hip flexors and quads. Much like the SMR techniques focus on opening the hip flexors and quads first to payoff the biggest release, restoring proper length to the quads and hip flexors will provide you with the most dramatic improvements in your functional movement patterns. By no means are the quads and hip flexors the only area you should focus on, but they impact your movements in such a large way that if you avoid addressing them you are missing the largest component to functional movement. There are several progressions and regressions of this one stretch, so work up or down the scale as needed to get your best results. There is no ideal position for everyone, only an ideal goal. That goal is to eventually rest your hip comfortably on the bench while you grab your foot overhead with both hands while the entire other foot is comfortably resting on the floor forward of your torso. Video coming soon.
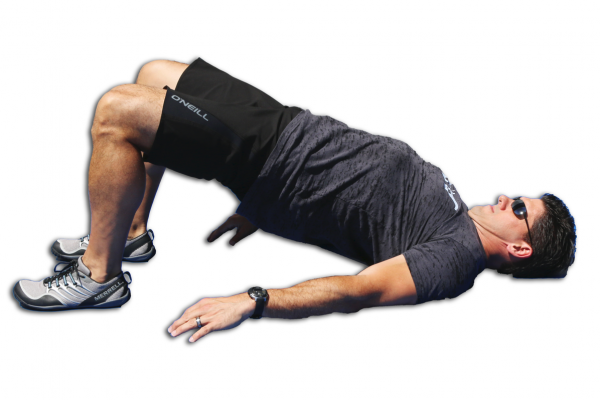
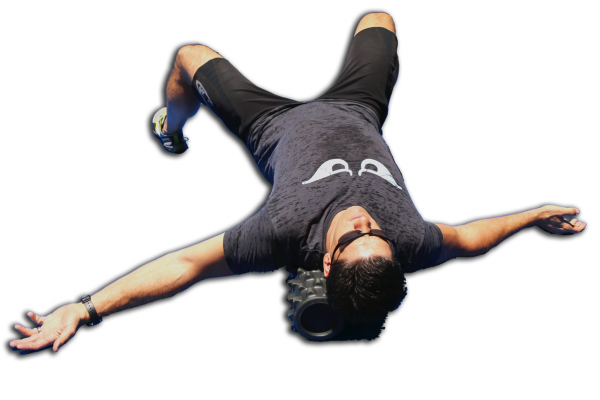
5) Bridge, click here. This stretch should feel quite easy, and many people use it as a functional movement to warm up the hips and posterior chain. If your hip flexors are especially tight then it is wise to practice holding this stretch for a short time to "relearn" how to activate the muscles around your hips. When you practice a movement quickly you utilize the nerve pathways you are familiar with, and will continue practicing bad habits. Instead of reinforcing the wrong habits when it comes to functional movement, take the time and put in the effort to learn how to do it right. Combining this stretch with the Supported Corpse, Marching Corpse, and Cobra stretches along with the quads and hip flexor SMR techniques tends to provide rather quick results. Video coming soon.
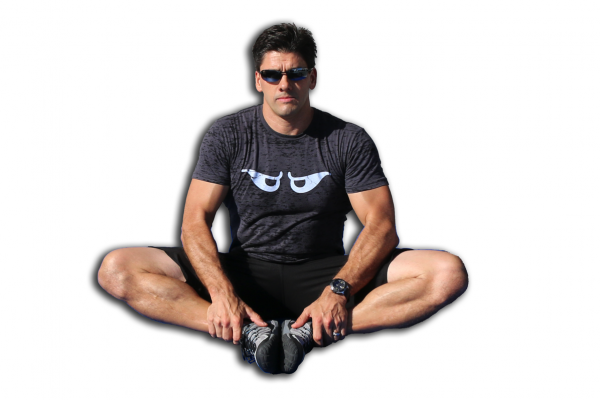
6) Butterfly, click here. This is a regression stretch of the Straddle stretches. The Straddle stretches apply tension to both the hamstrings and the adductors, whereas this stretch relaxes the hamstrings and places the emphasis mostly on the adductors and quads (as your heels get closer to your groin). If the Straddle stretches are easy then this stretch will be easy for you, and you may wish to do it quickly for many repetitions as a warm up. Before you jump into only practicing this movement as an exercise, gradually try to work your heels to your groin. Ideally your heels will eventually be in contact with your pubic bone and your knees will comfortably lie flat on the floor out to the sides. Video coming soon.
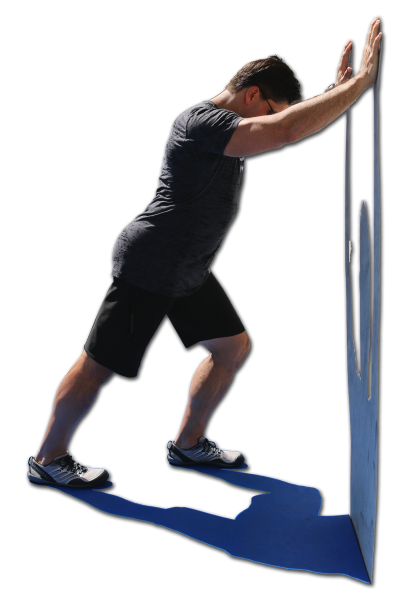
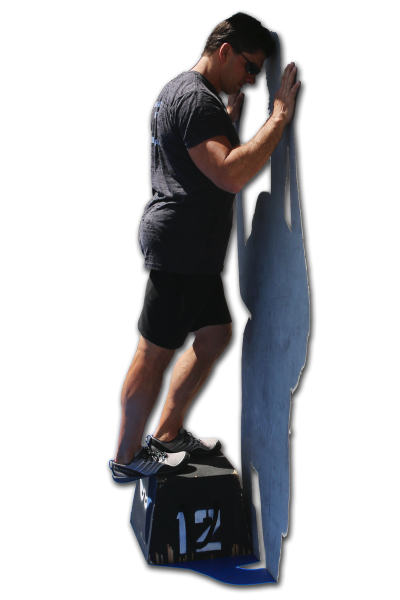
7) Calf Press, click here. This stretch helps you loosen your calves and hamstrings so that you have better knee and ankle function. Many people have been told "do not lock your knees." This is true if you intend to stand for a long time. However, if you do not regularly fully extend your knees (i.e., "lock them") you will gradually lose the ability to do so, and your knees will grow tighter and more difficult to extend. By gradually getting your foot farther and farther away from the wall your Soleus, Gastrocnemius, hamstrings and other muscles that limit range of motion at your knee will lengthen and allow proper leg posture with deep squatting, running, lunging, and anything else that involves the legs. Video coming soon.
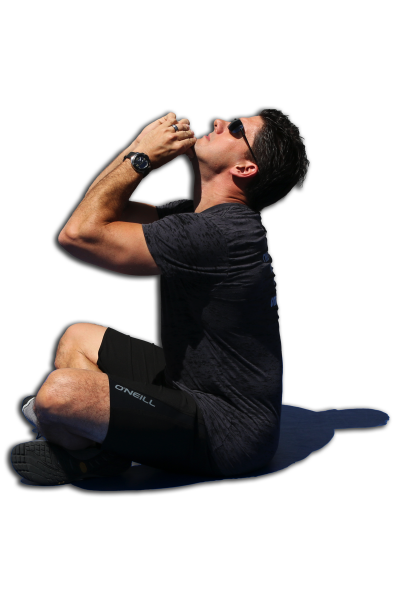
8) Chin Press, click here. The Head Hang Backward stretch can make some people light-headed due to excessive tightness in their cervical erectors. This tightness limits proper proper neck ROM. By pressing your thumbs against your chin as you lean your head backward you may notice you experience less dizziness. Most people will need less of this stretch and far more time devoted to the Chin Tuck, Head Hang, or other stretches and SMR techniques for to lengthen and relax the muscles on the back side of their necks. Use your best judgment for which stretches you need most often. Video coming soon.
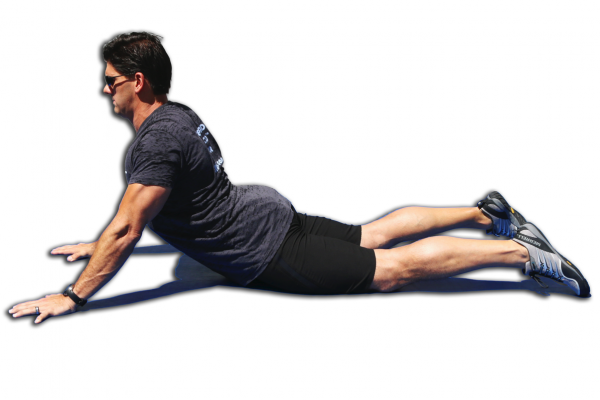
9) Cobra, click here. This is an active stretch to compliment the passive Supported Corpse stretch. When your body is ready for this stretch it is possible to achieve much more extension of the hips than is possible with Supported Corpse. However, it is also likely that you will focus too much attention on pressing harder and activating the muscles of your core, shoulders, and hips instead of relaxing (and lengthening) them. Be sure your focus is on relaxing your hips into the ground as you practice the Cobra. If you find you cannot relax then spend more time working on Supported Corpse or Marching Corpse to prepare for the Cobra. Video coming soon.
10) Cross Over Toe Touch, click here. This is a more advanced stretch for the back of your knee than the Calf Press, but is also a bit more dangerous. If you have trouble getting into the start position with this stretch you should probably practice the other calf and hamstring stretches until they get a bit easier so you do not injure your knee joint by applying too much pressure with your front leg. Assuming you are ready for this stretch you can get a good release in most of the muscles of the lower posterior chain when practiced correctly. Video coming soon.
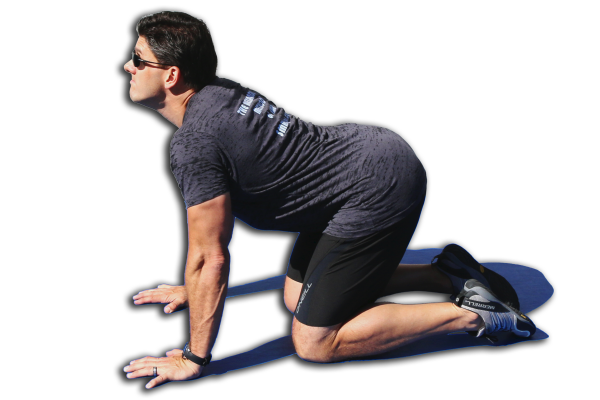
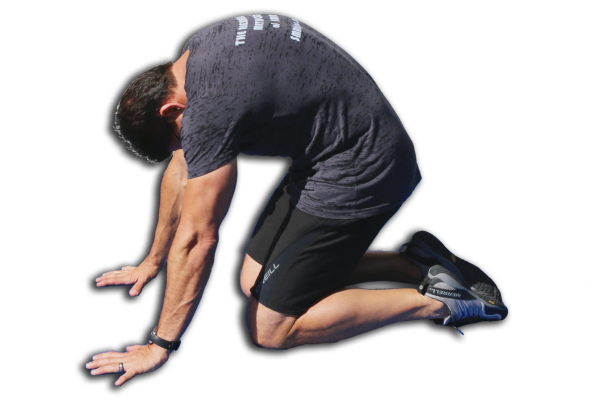
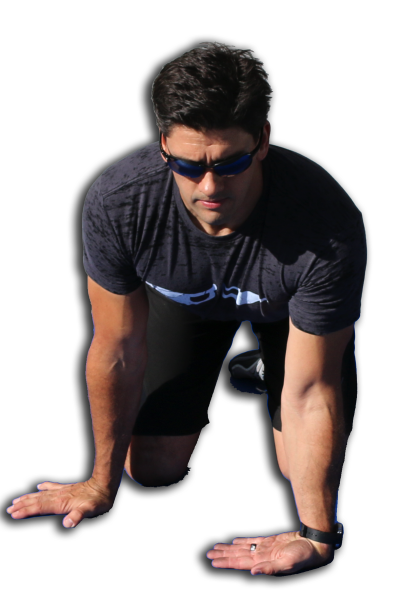
11) Daisy Cow, click here. This position should be quite easy for you to do. If it is not then your core flexibility is lacking the proper ROM to adjust a load when you move with weights, which increases your chances of losing your balance and injuring yourself as you attempt to manage your movements with the wrong muscles. Pairing this stretch and the Scaredy Cat is a common combination. Practice this stretch along with Scaredy Cats, Scorpions, Cross Overs, and several of the lower and mid-back SMR techniques to regain the ROM you need to handle the stresses of daily life (not to mention any challenging workouts). Video coming soon.
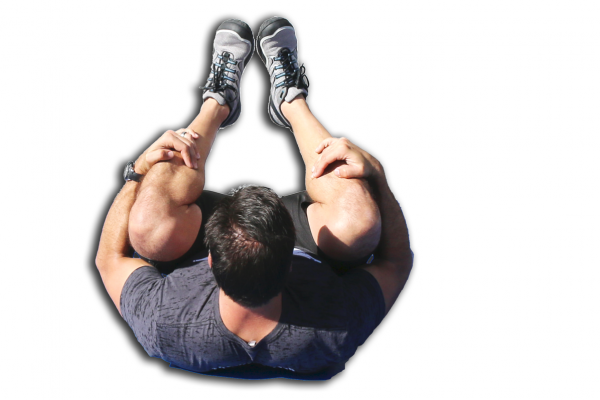
12) Dual Knee Hug, click here. This is a good stretch to add into a routine to improve lumbar and thoracic flexibility (tight lower and mid-back). So many adults grow stiff as they age and lose proper ROM in their core, which leads to all kinds of troublesome compensations. If you have proper ROM through your core this stretch should be too easy for you, and you will need more aggressive or dynamic movements to further improve core mobility and stability. Scale your movements up or down to the level you need to get your best results. Video coming soon.
13) Elevated Calf Press, click here. This stretch helps you loosen your calf and foot muscles so that you have better ankle and foot function. By gradually getting your heel lower and lower below the support under your toes, your Soleus, Posterior Tibialis, and other muscles that limit your ankle ROM will lengthen and allow proper ankle and foot posture with deep squatting, running, lunging, and anything else that involves the feet. For a good calves routine, pair this stretch with the Cross Over Toe Touch stretch and Superlunges or Inchworms functional movements. Video coming soon.
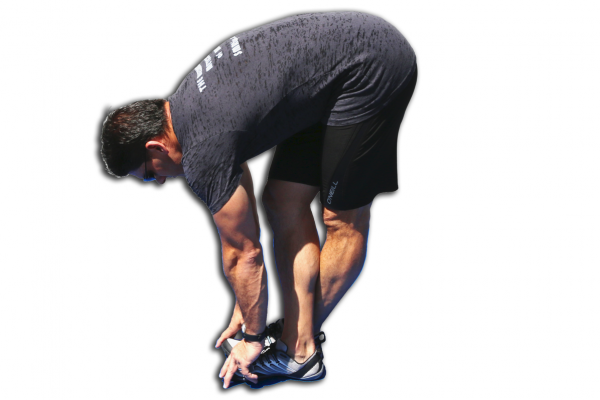
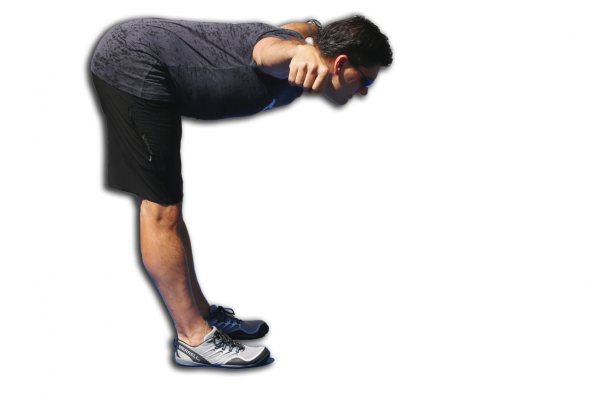
14) Good Mornings, click here. This movement is commonly utilized as both a stretch and a functional movement. A common fault is to allow the lower or mid-back to flex as you bend forward. This fault is usually due to the individual attempting to lean forward farther than their hamstrings length will allow, so they compensate by flexing other joints (namely, the spine) to get their chest and shoulders lower. It is more important that you maintain proper spinal alignment as you bend forward than it is how far forward you lean. Gradually you should notice you can lean your chest and shoulders closer and closer to the floor without rounding your back. Practice the Bench Foot Grabs along any of the Nose to Knees stretches or the Superlunges functional movement to improve your hamstring flexibility, which will make this stretch easier to perform. Video coming soon.
15) Hero Pose, click here. As mentioned earlier, this stretch is a progression of the Bench Hero Pose. As your quads and shins limber up you should have an easier time with Hero Pose. Ideally, this position should feel effortless. It may take some time to get to that point, depending on how tight you are when you start a flexibility program and also depending on how quickly your body can adjust to your program. Stick with it and gradually increase or decrease the intensity of the stretches you are doing based on your current flexibility needs (you may occasionally need to regress your efforts a step or two to make overall progress). Video coming soon.
16) Hurdle, click here. This stretch has received bad press for decades, due to the high risk it poses to your knee if you perform it incorrectly. However, it is quite easy to verify you are performing it safely...if you cannot comfortably tuck your toes back behind you so that your shin and the top of your foot rests on the floor then you should work on plantar flexion (pointing your toes) until you can. Practice Bench Hero Pose stretch to limber up your shins so that you can one day safely get into the starting position for this stretch. Be smart and prepare properly and the Hurdle stretches can be one of the most beneficial quads and hip flexor stretches you can do. Video coming soon.
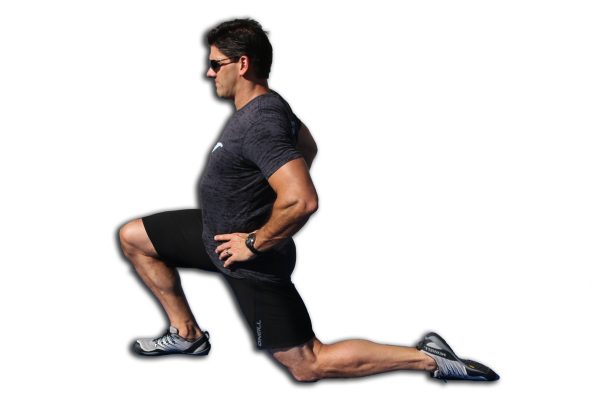
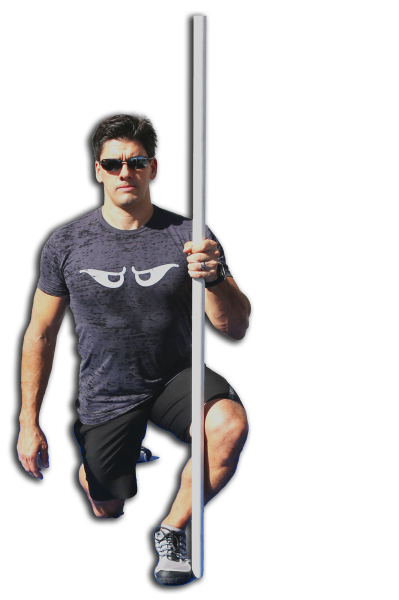
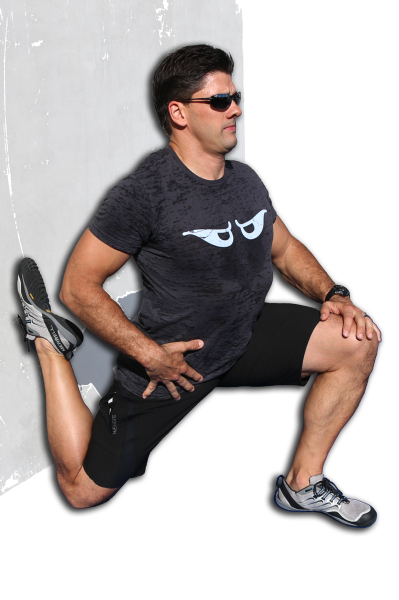
17) Kneeling Lunge, click here. Highly recommended if you have lower back, hip, or knee tightness or muscle pain. This movement will lengthen your quadriceps and hip flexors which tend to be tight together, and both contribute to lower and mid-back discomfort. The quads in particular are especially responsible for any knee discomfort. For an older video of how to do the Kneeling Lunge, click here. New video coming soon.
18) Lateral Head Pull, click here. This stretch is one of those that shouldn't be necessary, but for many people with office jobs is very necessary. The scalenes, a group of muscles along the side of your neck, tend to grow very tight over the long periods of time that office workers spend with their heads forward of their shoulders while working at their desks. Practice sitting with your head against a headrest and your neck in proper alignment with your head over your shoulders and you might find you do not need to practice this stretch nearly as often. Practicing the Sterno Roll and other neck SMR techniques is a good idea if you find you have lots of neck tension. Video coming soon.
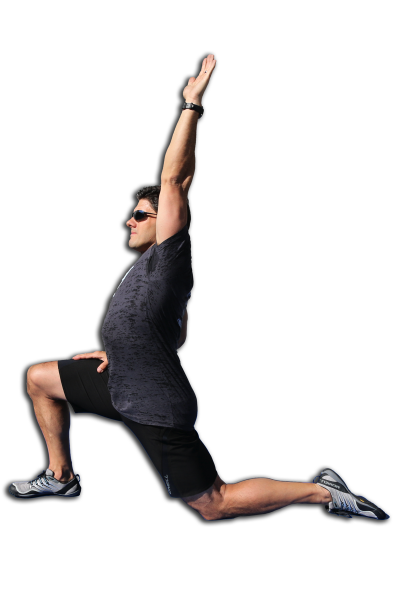
19) Lunge and Reach, click here. This stretch is a progression of the Kneeling Lunge. It is important to first practice the Kneeling Lunge and be able to feel your thigh and hip relax before adding the reach to it. If you reach before you learn how to relax the front of your hip you will not be able to fully lengthen the Psoas, a hip flexor muscle deep in your core that runs along the front of your hip and inserts into the very top of your thigh. The purpose of this stretch is to focus more attention on the Psoas and Iliacus as you lean forward into the lunge. Be sure you can feel this lengthening of the deepest hip flexors, or choose one of the other hip flexor stretches such as the Bench Lunge. As that stretch gets easier, come back to this one and see if you can feel your deep hip flexors lengthening as you reach and lean forward. When you can feel that lengthening taking place you are on the right track. Video coming soon.
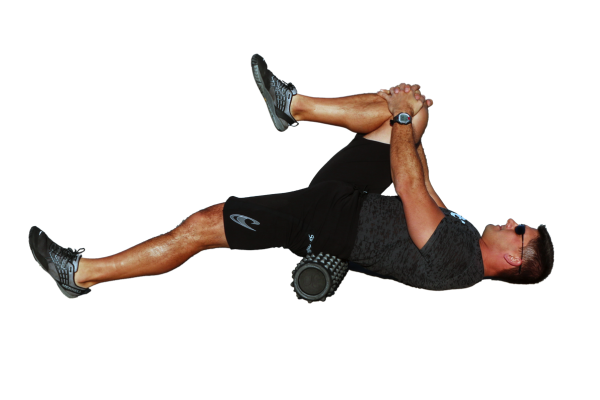
20) Marching Corpse, click here. Highly recommended if you have lower back tightness or muscle pain. This stretch is a version of the Thomas Test stretch that you can perform by yourself. It is best utilized when combined with the Supported Corpse. This stretch can lengthen your tight deep hip flexors, which tend to be overlooked when people address their own lower and mid-back discomfort. Learn the hip flexors and how they impact your back issues and many of your daily aches and pains will be minimized. Video coming soon.
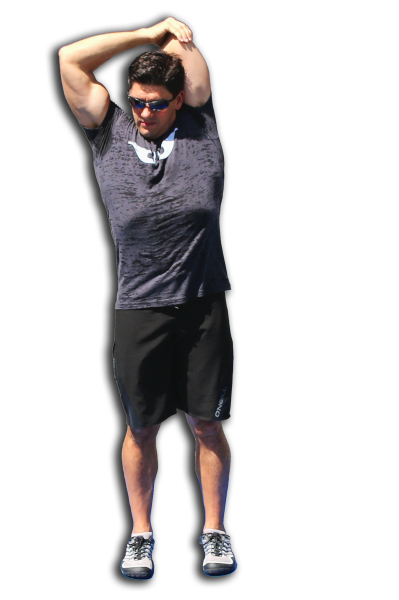
21) Overhead Elbow Grab, click here. This is a fairly basic stretch for the Triceps and other muscles that cross the armpit. If it is difficult to grab your elbow with the opposite arm then the Overhead Elbow Press is a good alternative. The Overhead Stick Pull can be both a regression and a progression to this stretch, depending on how close together your hands are. Practice all of the Triceps stretches to find the ones that provide you with the best results. Video coming soon.
22) Overhead Elbow Press, click here. This stretch is a regression of the Overhead Elbow Grab. When this stretch is becoming easy, try the Elbow Grab again. The Overhead Stick Pull can be used to make the transition and develop the flexibility to grab your opposite elbow. Video coming soon.
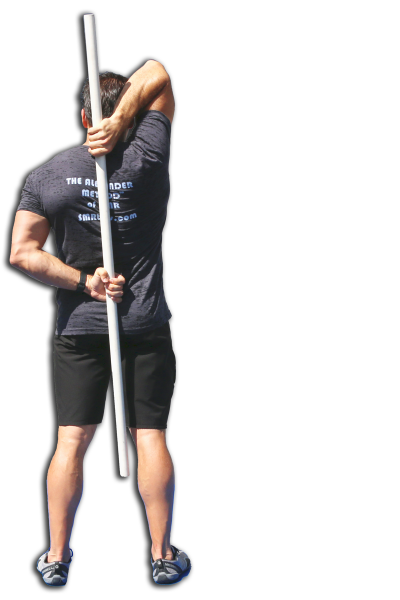
23) Overhead Stick Pull, click here. This stretch can work for both the upper and lower arm, depending on which hand is pulling. To stretch your Triceps, pull down with your lower arm. To stretch your Infraspinatus, Teres Minor, and several other shoulder & arm muscles, pull up with your upper arm. You will likely find that you can pull down on your upper arm farther than you can pull up on the lower arm. Be sure to use a gentle pull, otherwise you can injure yourself (especially when pulling up on the stick to stretch the lower arm) or at the very least activate the Stretch Reflex and not allow any lengthening to the place because your muscles are fighting the stretch. Harder is not always better. Video coming soon.
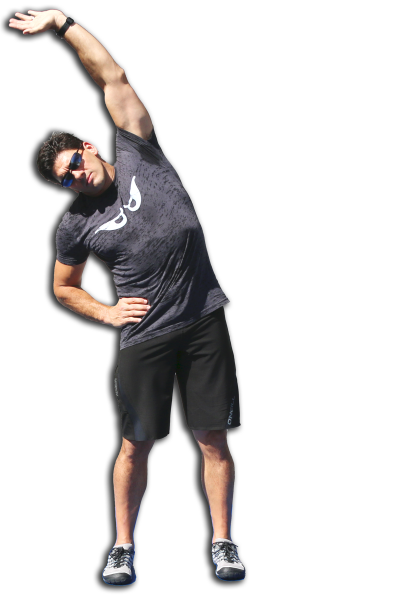
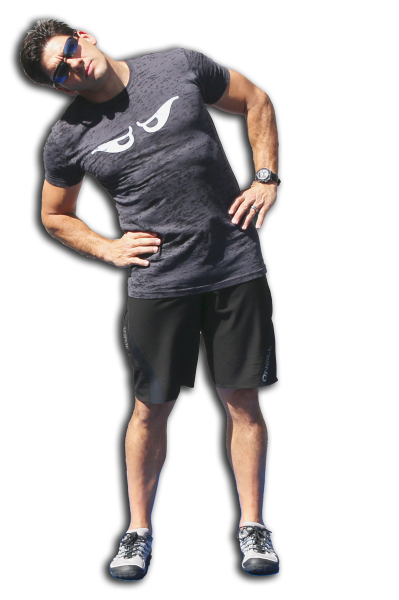
24) Overhead Tilt and Reach, click here. This stretch should be easy for you if your shoulder and core are healthy. If you have trouble raising your arm overhead then you should also practice stretches such as the Cat Claw and Standing Cat Claw, and SMR techniques such as the Lat Roll and Subscap Press. If you have pain with movement you should contact a medical professional to enlist their assistance. The combination of professional care and self care will provide you with your best results. This movement is commonly used not only as an active stretch but also as a functional movement in a warm up or cool down. It can be helpful in opening up areas that tend to grow tight along our sides as we sit for prolonged periods of time. Video coming soon.
25) Post Tib Lunge, click here. This stretch can be used as an assessment of ankle mobility as well as a lengthening technique to remedy the tightness found. The target of this particular movement is the deepest muscle in the back of your calf, which runs along the inside of your ankle and attaches to the bottom of your foot. This is one of those stretches that is easy to be too aggressive with which renders it ineffective. Be sure you focus on deep relaxation rather than attempting to force your calves to release. If your heel raises off the ground the focal point shifts from the Posterior Tibialis to the flexors. Neither technique is "wrong," just different. If you have trouble keeping your heels on the ground when you squat then be sure you practice this technique with your heels planted on the floor, along with the two Calf Press stretches and SMR techniques such as the Calves Roll & Post Tib Press. Video coming soon.
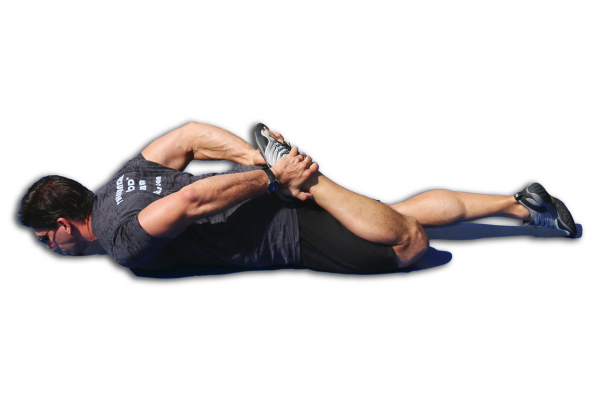
26) Rear Foot Grab, click here. This stretch is a more aggressive progression of the Standing Rear Foot Grab because it is more difficult to flex your hip as you attempt to grab your foot. If this stretch is difficult for you then try the standing version. If the standing version is difficult then try the Bench Lunge stretch. We have many versions of stretches and movements for addressing the quads and hip flexors because not everyone has the same ROM. Some people can easily grab their foot, and others can't. Use the stretches most appropriate for you. Scale the stretches and techniques you use as needed to match your current level of fitness. Eventually this stretch should be easy for you, and along with that ease comes better functional movements in every endeavor. Video coming soon.
27) Scaredy Cat, click here. This stretch works very well when paired with Daisy Cow. The two movements can be performed as individual stretches or as alternating functional movements in a warm up. The purpose of this stretch is to improve your ability to flex your spine and separate your shoulder blades. Part of the purpose of Daisy Cow is to improve how close together you can draw your shoulder blades, so that one day you can actually make contact with them in the bottom of the stretch. Having full range of movement with your shoulders improves how well you can stabilize them when you carry a load. Practice additional shoulder stretches and SMR techniques to maintain proper ROM. Video coming soon.
28) Seated Piriformis Block, click here. This stretch should be a requirement for most office workers. Sitting for prolonged periods tends to tighten the hips and lower back. This stretch is one of many that reverses that tightening. It may be easier for you to practice this stretch laying on your back instead of sitting up. There is a tendency to keep the muscles of the hip too active when practicing this in a sitting position, especially if you have never tried it before. If you struggle with feeling any release as you practice this stretch, try the Wall Piriformis Block and see if that works better for you. Regular practice of both versions helps you achieve better release. When dealing with tightness in the outside of your hip it is likely you should devote some time and energy toward addressing your hip flexors, quads, and adductors for lasting relief. Video coming soon.
29) Shifted Angel, click here. This is a variation of the Supported Angel stretch. Much like the Marching Corpse intensifies the stretch possible in the deep hip flexors, this stretch intensifies the stretch possible in the pecs and across the front of the shoulder. If you think of Supported Angel and Shifted Angel in the same way you think of Supported Corpse and Marching Corpse, then you are on the right track. Many people have tight hips and tight shoulders. The Corpse and Angel stretches are designed to help overcome some of the tightness in these trouble areas. All 4 stretches are meant to be as passive as possible, with the Marching Corpse and Shifted Angel requiring some activation to maintain the advanced position. If you are noticing no release after holding the advanced position for more than 20-30 seconds, then you likely need other stretches or SMR techniques to "unlock" areas that are hindering your progress. Video coming soon.
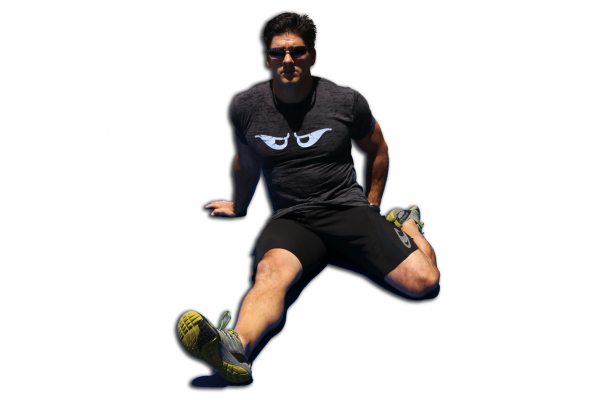
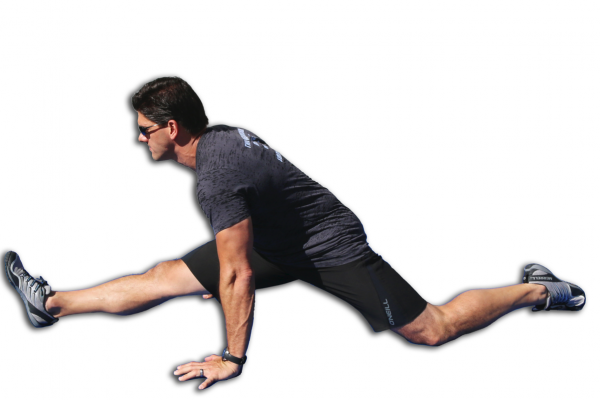
30) Split, click here. This position is an advanced one for most, but is a reasonable goal for almost all. If you cannot comfortably sit in a split then you have tension in your hip flexors or hamstrings that limits proper ROM. You can (and should) be better. Splits are not reserved for only elite fighters, gymnasts, and dancers. Pictured you can see there is more limitation in the hip flexors than the hamstrings. Make note of which area limits you and focus your attention on that area. For Jeff to achieve a proper split he needs to practice the Wall Lunge, Rear Foot Grab, Bench Lunge, and perhaps the Psoas Press, Iliacus Press, and Quads Roll SMR techniques. If your attempt at a split looks comparable, include the hip flexor techniques and stretches above into your routine. If your hamstrings are the issue, practice stretches such as Bench Foot Grab and Calf Press along with functional movements such as Superlunges and Sumo Squat Toes. The Quads Roll SMR technique will help you get more out of your Hamstrings Press technique, due to the interconnected nature of the quads and hamstrings. Video coming soon.
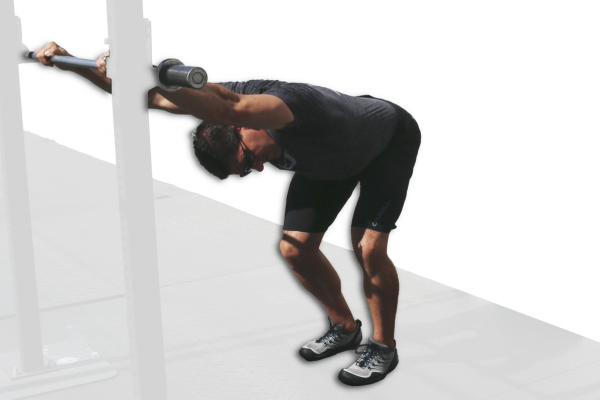
31) Standing Cat Claw, click here. This is a modification to the Cat Claw stretch practiced on the floor. It is neither harder not easier, but only a different way to approach stretching the muscles that cross the shoulder joint. Some people have trouble kneeling comfortably and those people will likely prefer this stretch. It is important to work toward being able to practice and benefit from both stretches, so even though you may prefer one of them be sure you try the other on occasion. With this stretch it is important to remember to not use the bar for balance. Your body weight should primarily be supported by your feet. If you use the bar for support you will engage the muscles you are attempting to stretch, and your lengthening efforts will be less productive. For video of how to do the Bar Drop (aka Table Top Stretch) for your Lats, click here. New video coming soon.
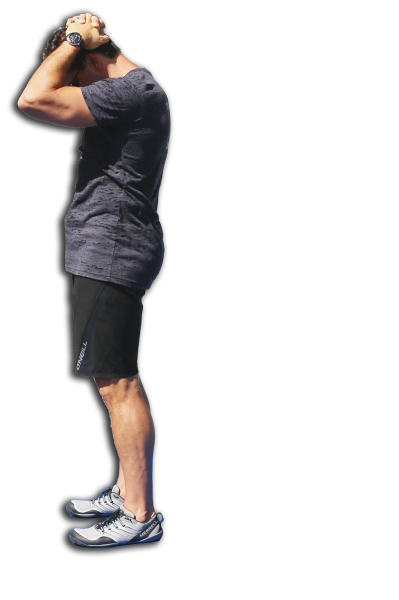
32) Standing/Seated Head Pull, click here. This stretch should be quite easy for you. If it isn't, then you have a lot of neck work to do. It is important to not assume the health of any area of your body, but instead you should regularly inspect each area for tension or restrictions. One way to do that is to simply stretch that area to full ROM and see how comfortable it is (or if it is even possible to reach full ROM). This stretch can be performed standing or sitting, and it is almost exactly the same stretch. The advantage of practicing this in a standing position is that you can tuck your tailbone under to flex the entirety of your spine, from head to bottom. Combine this stretch with others such as the Chin Tuck, Chin toward Shoulders, and Chin to Clavicles, plus SMR techniques such as the Neck Roll, Sterno Roll, Levator Press and others for your best results. Seeking professional assistance when addressing neck issues is always a good idea. Video coming soon.
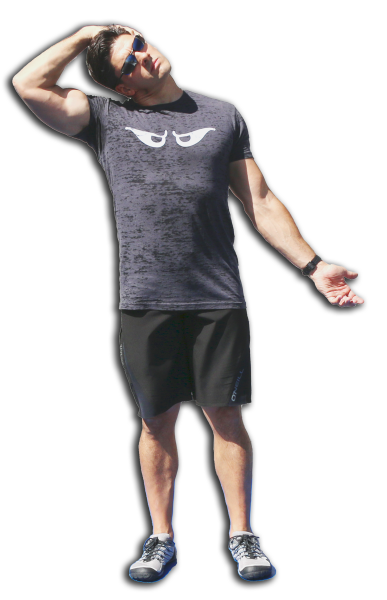
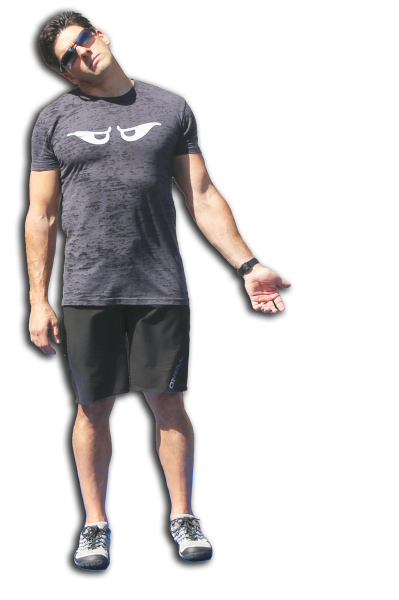
33) Standing Head Tilt, click here. This stretch is a less intense version of the Lateral Head Pull. It should be very easy to perform. If the Lateral Head Pull is painful or too intense to relax, then try this stretch. If this one is too intense to practice and feel any relief, you should contact a health professional to get assistance. The target of this stretch is the scalene muscles mentioned in the Lateral Head Pull. Both stretches address these important muscles used to stabilize, flex, and rotate your head and neck. Office workers who spend hours leaning forward with their heads in front of their shoulders are especially likely to need this stretch along with the others that address each area of the neck. If you spend hours each day with your head forward of your shoulders (desk work, driving, standing at a counter, etc.) then you should practice this stretch every day to relieve some of the tension you developed during the course of your day. Video coming soon.
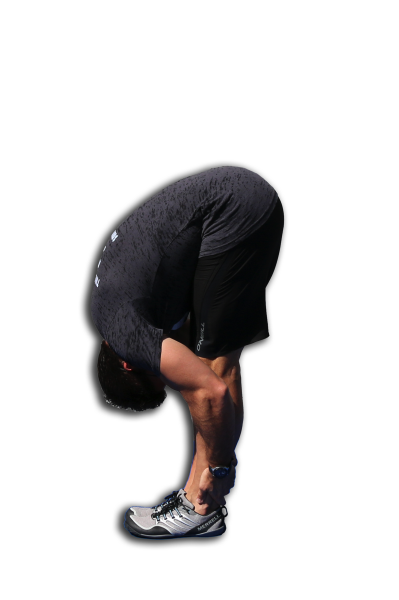
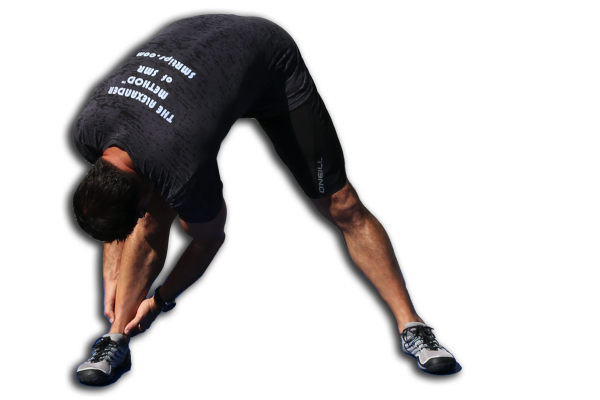
34) Standing Nose to Knees, click here. This is a simple stretch, but does require some balance. If you have trouble balancing then try the seated Nose to Knees stretch. The main benefit to this stretch compared to the seated version is that this one allows you to more easily rotate the hips to stretch the hamstrings. The seated version is likely to cause you to flex your spine more than you flex your hips, so watch for that. Some spinal flexion is okay with both of the stretches, but the target is the hamstrings. If you wish to focus more on spinal flexion you should practice bent-legged stretches such as the Dual Knee Hug. Practicing the straddle stretches will likely improve this stretch. Video coming soon.
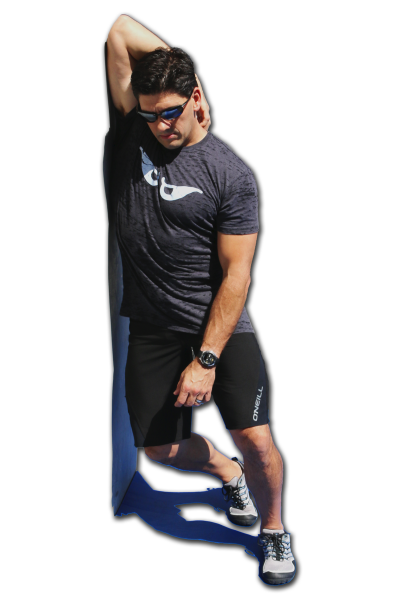
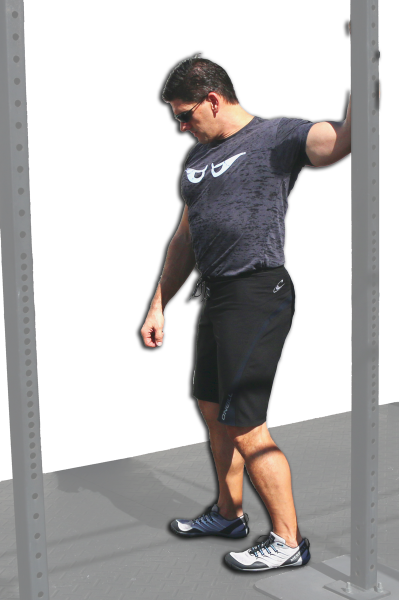
35) Standing Pecs Twist, click here. Helps you loosen your chest, shoulder, and arm muscles so that you have better shoulder and arm function. By gradually rotating a little more during this movement, your pecs, anterior delts, and other muscles that limit your shoulder range of motion will lengthen and allow proper posture with any movement that involves the shoulder. Much like with the Standing Cat Claw stretch, it is important when practicing this stretch that you keep your body weight primarily supported with your legs, and not the arm you are attempting to stretch. Many people will lean their weight into the support their arm is braced against, which activates the very muscles you are trying to stretch (and makes your efforts less effective). Your arm should be resting braced against the support, not supporting you. For a video of how to do some Chest lengthening techniques, click here. New video coming soon.
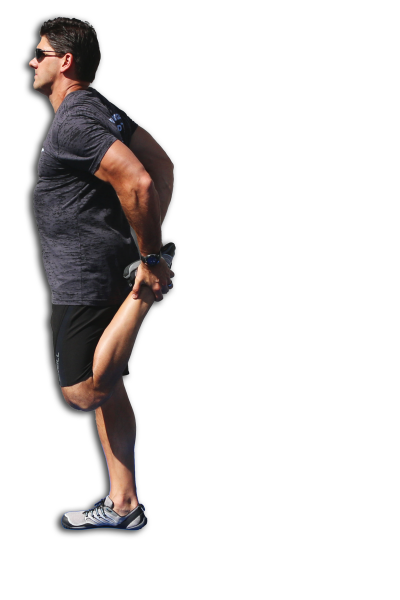
36) Standing Rear Foot Grab, click here. For all practical purposes this is a standing version of the Rear Foot Grab stretch (in which you are lying face down). However, assuming you have decent balance on one foot, this stretch is likely to be easier to perform. This stretch allows more hip movement as you attempt to grab your foot, so you may more easily be able to reach it. If balance is an issue for you and you can't stand on one foot long enough to get a decent stretch while holding your foot, then practice some of the other quads and hip flexor stretches such as the Bench Lunge, Wall Lunge, Hero Pose, etc. Video coming soon.
37) Standing Straddle Nose to Knees, click here. This stretch is different than the Standing Nose to Knees in one specific way: by spreading your legs you can focus more attention on the hamstrings of each leg. It is also easier to maintain your balance with this version. Practice each version of the Nose to Knees stretches to find the ones that work best for you. As you get more flexible you will notice nuances to each one that allows you to focus more on one specific area of the posterior chain. Video coming soon.
38) Trunk Tilt, click here. This stretch is a regression of the Overhead Tilt and Reach. This stretch should be "too easy" for most people to feel any lengthening taking place. If you have good functional ROM of your core muscles, then this stretch will be too remedial for you. If you have limited shoulder ROM and tight core muscles, then this stretch is for you. We've included it as a modification to the Overhead Tilt and Reach that does not require the shoulder ROM to reach overhead. In addition to practicing this stretch and possibly SMR techniques such as the QL Roll and Psoas Press, you should contact a professional therapist to get some hands-on care. You may need more professional care in the short-term to correct issues that your self-care will not be able to fix (and could actually make you worse in some cases involving spine disorders). This is a good stretch to use as a basic assessment of lateral core flexibility. Video coming soon.
39) Wall Lunge, click here. This stretch is strongly recommended if you have lower back and/or hip tightness or muscle pain (including the outside of your hip, like Piriformis issues or trouble with Sciatica). This movement will lengthen your quads and hip flexors. The deep hip flexors tend to be the missing link when practicing self-care to address lower and mid-back discomfort. There are two major versions of this stretch that dramatically change which muscles are being stretched. Pictured at right is the version in which you pull your hip forward as you keep your chest upright and attempt to tuck your tailbone under. This version targets the hip flexors, likely the area most in need of lengthening. In another version of this stretch (pictured in the downloadable PDF linked above) you press your hips back against your foot. That version focusses the attention on your quads. Since your Rectus Femoris muscle is part of the quads and is also a hip flexor, it benefits from both versions. What does this mean? It means you should practice both versions regularly for your best results. Video coming soon.
40) Wrist Extensors Press, click here. Helps you loosen the finger, thumb, and wrist muscles along the back of your forearm so that you have improved hand & wrist function. By gradually getting your elbow straighter and straighter during this movement the muscles that limit your elbow & wrist ROM will lengthen and allow proper hand & wrist posture with any movement that involves the wrist (like Oly lifts and handstands). Video coming soon.
41) Wrist Flexors Press, click here. Helps you loosen the finger, thumb, and wrist muscles along the front of your forearm so that you have improved hand & wrist function. By gradually getting your elbow straighter and straighter and your fingers & thumb turned farther outward & back during this movement, the muscles that limit your elbow & wrist ROM will lengthen and allow proper hand & wrist posture with any movement that involves the wrist (like Oly lifts and handstands). Video coming soon. |
Skip to content